> For the complete documentation index, see [llms.txt](https://server-side.docs.sirdata.net/sirdata-server-side/llms.txt). Markdown versions of documentation pages are available by appending `.md` to page URLs; this page is available as [Markdown](https://server-side.docs.sirdata.net/sirdata-server-side/english-1/installation/dns-configuration/hostinger.md).
# Hostinger
🧠 What is a CNAME record?
A **CNAME** (Canonical Name) record is a way of saying:
> "This subdomain points to another address."
For example:\
`mydomain.com` → `xyz.mydomain.com`
***
### 🛠️ Steps to follow
#### 1. Log in to your hosting provider
Go to the website of your **domain provider** or **hosting provider**, then log in to your customer area.
***
#### 2. Access the DNS management of your domain
* Look for a section named **DNS**, **DNS Zone**, **DNS Settings** or **Domain Name Zone**.
* Select the relevant domain name (e.g. `mydomain.com`).
***
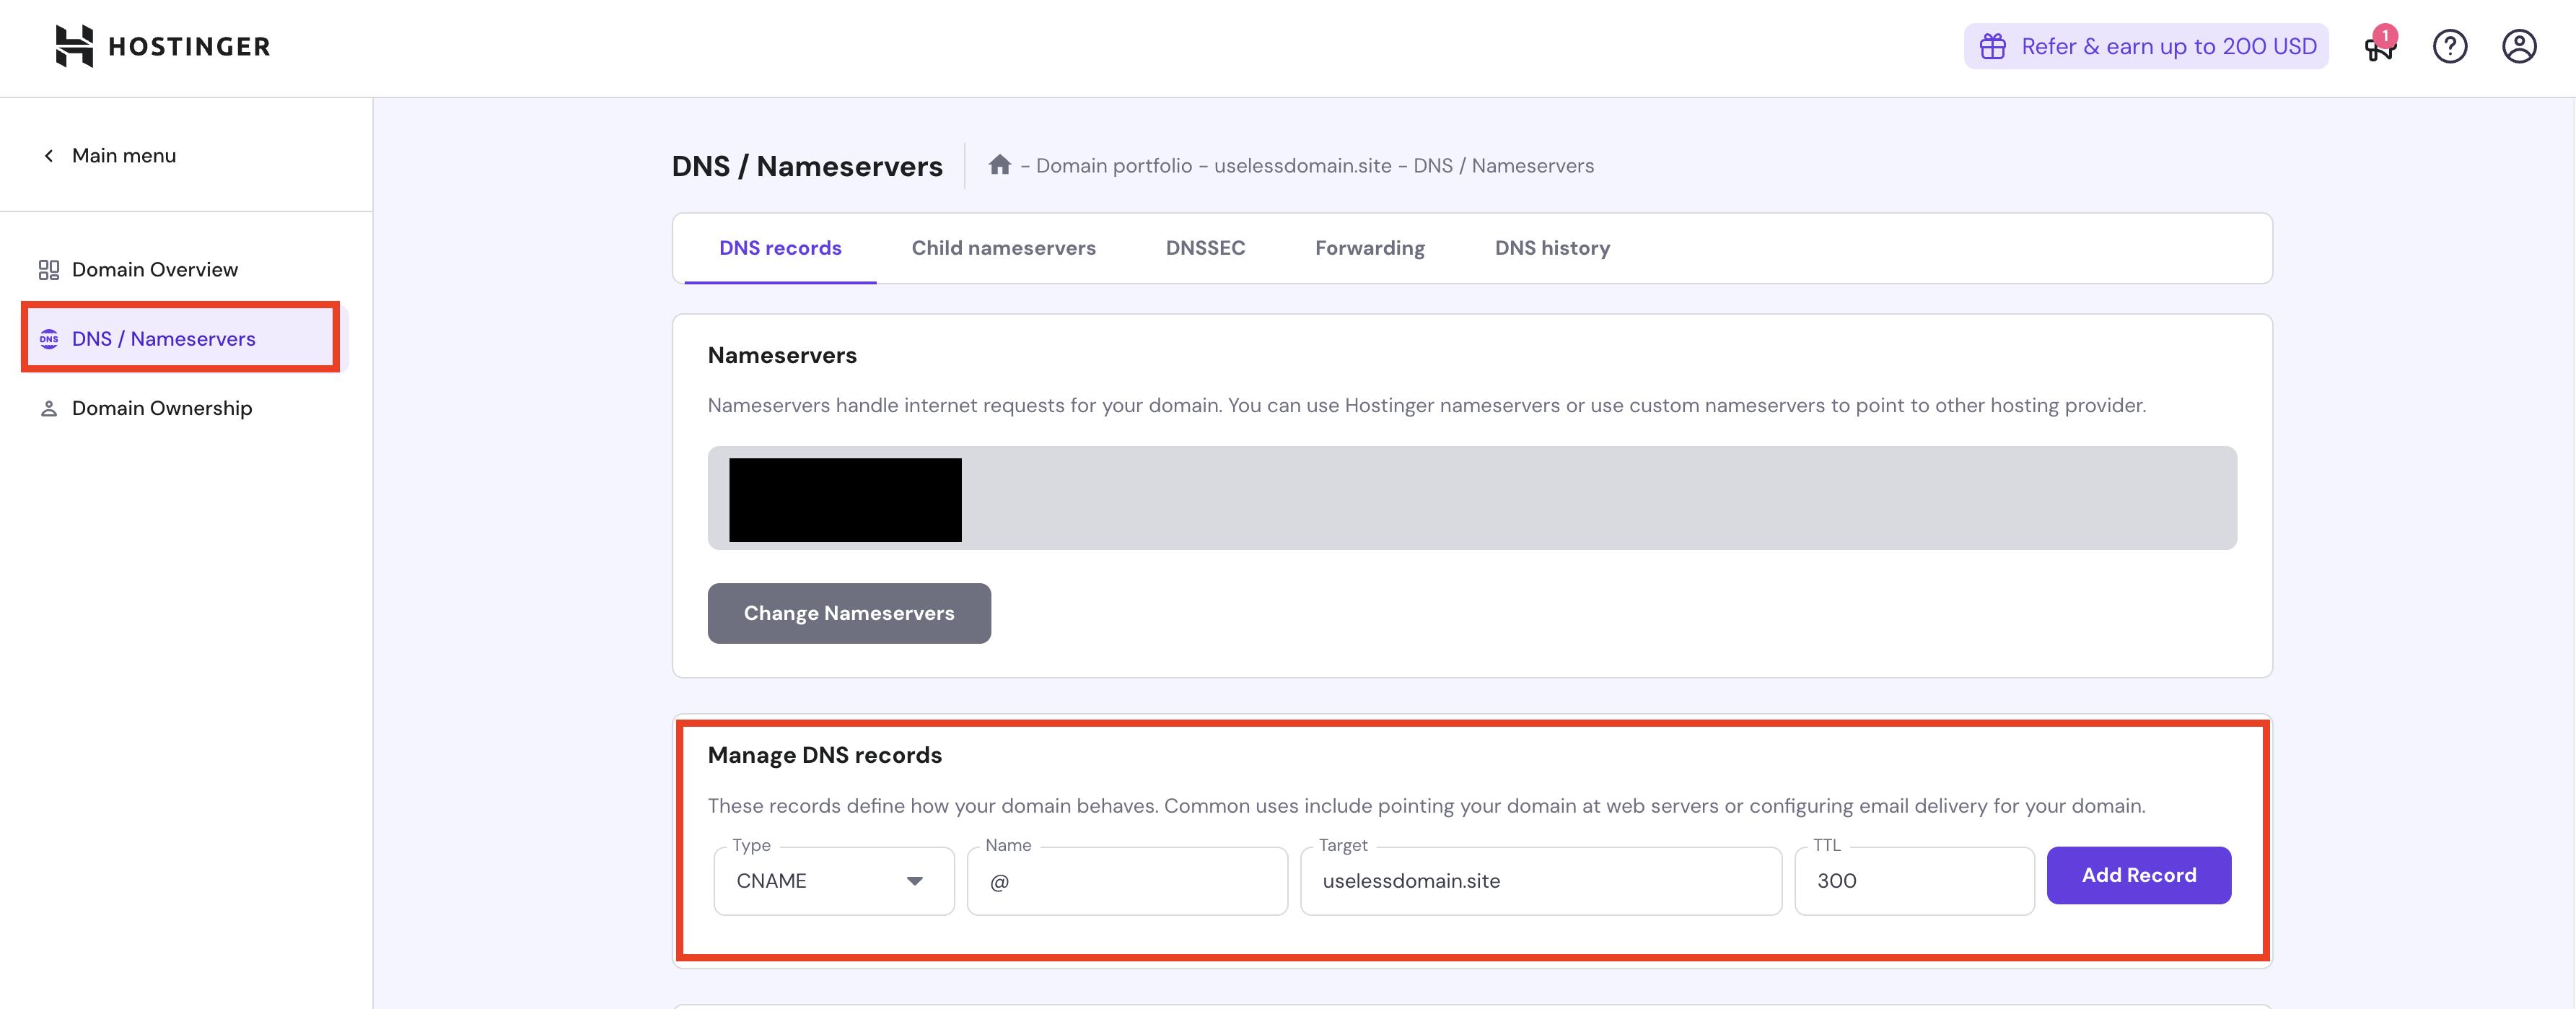
#### 3. Add a new CNAME entry
Click on **"Add a record"** or **"Add an entry"**, then
| Field | What you need to enter |
| --------- | -------------------------------------------- |
| **Type** | `CNAME` |
| **Name** | The **prefix** of the subdomain (e.g. `xyz`) |
| **Value** | The target address (e.g. `mydomain.com`) |
| **TTL** | 300 |
📌 **Important**:\
Do not enter the full subdomain in the "Name" field (e.g. **NOT** `.mydomain.com`) — just enter xyz.
***
#### 4. Save
Click on **"Save"**, **"Confirm"** or **"Add"**, depending on your hosting provider.
***
#### 5. Wait for DNS propagation
The change can take from a few minutes to a few hours (sometimes up to 24h).\
You can check that the CNAME is working with a site such as:
🔗
6. Once the DNS is pointed via CNAME, remember to get back to us so we can verify your installation.